
Step-by-Step Hydraulic Press Preventive Maintenance Guide for Workshops


The Critical Role of Preventive Maintenance in Modern Workshops
In the high-stakes world of metal fabrication, the hydraulic press stands as a cornerstone of production. Whether it is used for deep drawing, punching, blanking, or forging, the reliability of this machine directly dictates the profitability of a workshop. Implementing a Step-By-Step Hydraulic Press Preventive Maintenance Workshops program is not merely a suggestion; it is a fundamental requirement for any facility aiming to minimize downtime and maximize equipment lifespan. At HARSLE, we understand that a well-maintained machine is the difference between meeting a deadline and facing a costly production halt. Preventive maintenance (PM) involves a systematic approach to inspecting, cleaning, and repairing equipment before failures occur, ensuring that every component—from the smallest seal to the massive main cylinder—operates at peak efficiency.
The philosophy of preventive maintenance shifts the workshop culture from a reactive “fix it when it breaks” mindset to a proactive “keep it running” strategy. This transition is essential because hydraulic presses operate under extreme pressures, often exceeding several thousand PSI. Under such conditions, even minor irregularities can escalate into catastrophic failures. By following a structured Step-By-Step Hydraulic Press Preventive Maintenance Workshops guide, operators can identify early warning signs like micro-leaks, unusual vibrations, or slight temperature fluctuations. These early interventions prevent the ‘domino effect’ where one failing component puts undue stress on others, eventually leading to a total system breakdown that could cost tens of thousands of dollars in parts and lost labor.
Furthermore, the safety implications of maintenance cannot be overstated. A hydraulic press that is not properly maintained poses a significant risk to operators. Worn hoses can burst, faulty safety light curtains might fail to trigger, and loose mechanical fasteners can lead to structural instability. A comprehensive maintenance plan ensures that all safety protocols and physical guards are functioning as intended, protecting the workshop’s most valuable asset: its people. In this guide, we will delve into the technical nuances of maintaining HARSLE hydraulic presses, providing a roadmap for workshop managers to establish a world-class maintenance culture.
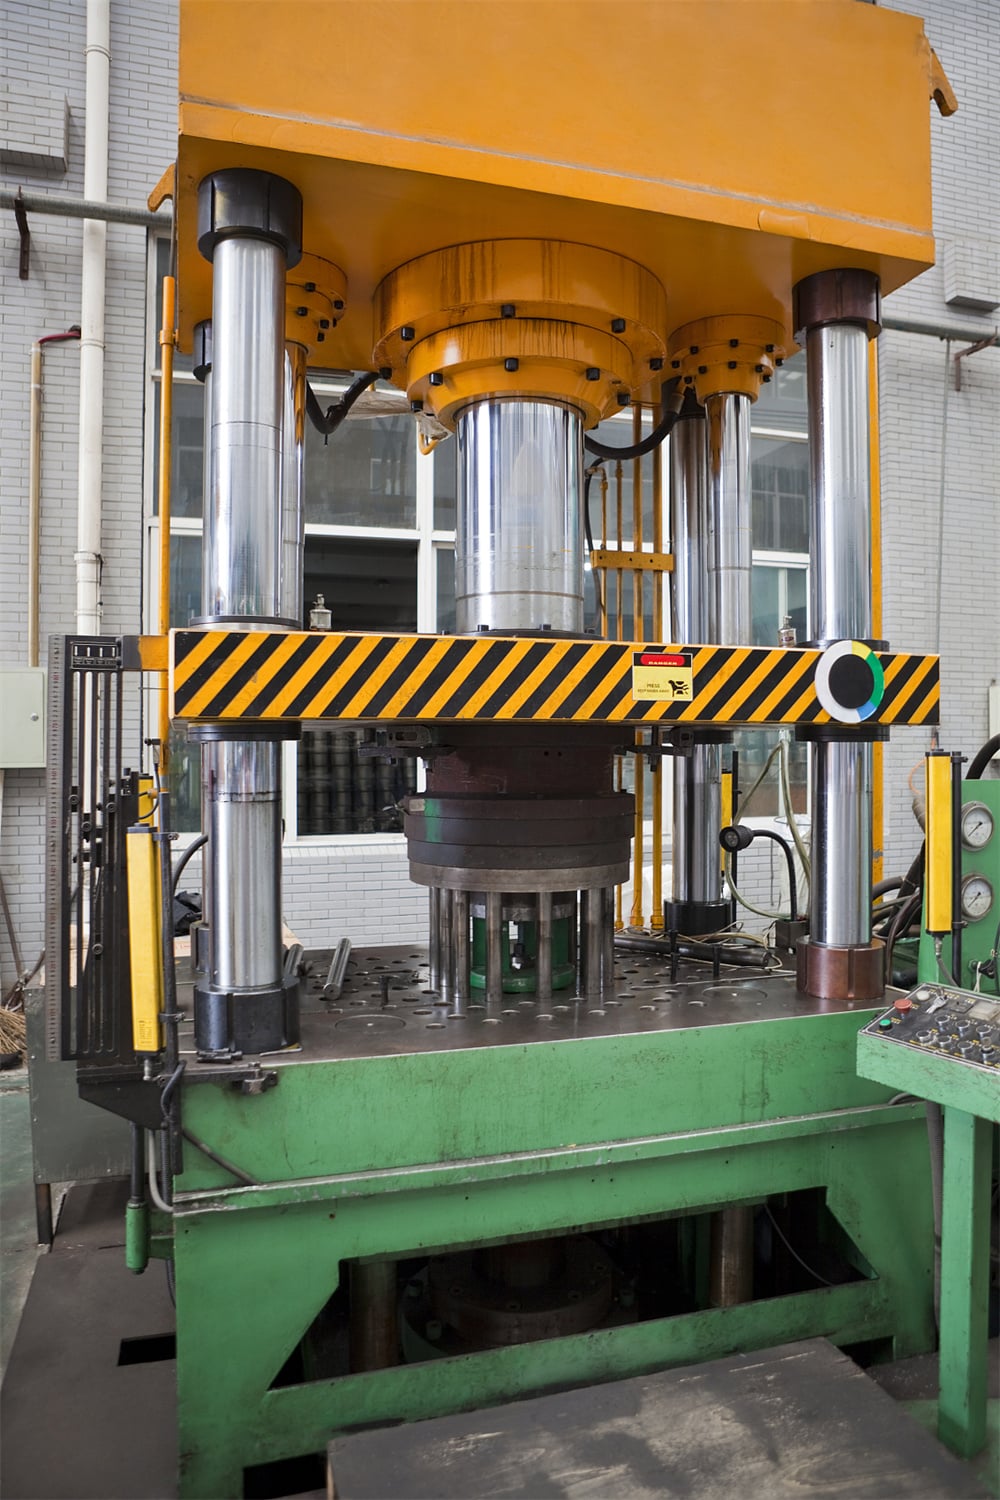
Step 1: Daily Inspection Protocols – The First Line of Defense
The foundation of any Step-By-Step Hydraulic Press Preventive Maintenance Workshops routine is the daily inspection. This should be performed at the start of every shift before the machine is cycled. The goal is to establish a baseline of “normal” operation so that any deviation is immediately apparent. Operators should begin with a visual sweep of the entire machine. Look for signs of oil puddles on the floor or weeping around cylinder glands and hose connections. Even a small drop of oil can indicate a seal that is beginning to fail. If left unaddressed, this leak will not only waste expensive hydraulic fluid but also allow contaminants to enter the system, leading to internal component wear.
Next, check the oil levels and temperature. Most HARSLE hydraulic presses are equipped with sight glasses and temperature gauges. The oil level should be within the designated range; too low, and the pump may cavitate; too high, and the oil may overheat or foam. Temperature is equally critical. Most hydraulic systems are designed to operate between 100°F and 130°F (38°C to 54°C). If the oil exceeds 150°F (65°C), the chemical structure of the fluid begins to break down, losing its lubricating properties and damaging seals. Daily monitoring allows you to catch cooling system failures or internal friction issues before they cook the hydraulic fluid.
Safety devices must also be tested daily. This includes the emergency stop buttons, light curtains, and two-hand control interlocks. If the press features a sliding gate or physical barrier, ensure it moves freely and locks securely. A daily logbook should be kept near the machine where the operator signs off on these checks. This documentation is vital for accountability and provides a historical record that can be invaluable during troubleshooting or insurance audits. By dedicating just 15 minutes every morning to these checks, a workshop can prevent 80% of common machine failures.
Step 2: Deep Dive into Hydraulic System Maintenance
The hydraulic system is the heart and veins of the press. Maintaining the integrity of the hydraulic fluid is perhaps the most important aspect of the Step-By-Step Hydraulic Press Preventive Maintenance Workshops process. Contamination is the number one killer of hydraulic pumps and valves. Microscopic particles—often invisible to the naked eye—can act like sandpaper, grinding away at the precision-machined surfaces of the pump’s internal components. To combat this, filter elements must be replaced according to the manufacturer’s schedule, or sooner if the filter bypass indicator is triggered. Never wait for a total blockage to change a filter.
Oil quality should be analyzed at least twice a year. An oil analysis report provides a “blood test” for your machine, revealing the presence of metals (indicating wear), water (indicating cooling leaks or condensation), and the remaining additive levels. If the oil appears milky, it is contaminated with water; if it smells burnt or looks dark, it has oxidized. In addition to the fluid itself, the hoses and piping require close inspection. Look for “kinking,” bulging, or abrasion on the outer covers of hoses. High-pressure hoses have a finite lifespan and should be replaced proactively every few years, regardless of their outward appearance, to prevent sudden bursts.
The hydraulic pump and valves also require attention. Listen for unusual noises such as whining or banging (water hammer). Whining often indicates pump cavitation, which occurs when the pump is starved of oil, often due to a clogged suction strainer or an air leak in the intake line. Banging can indicate air trapped in the cylinders or a failing accumulator. Ensuring the air is properly bled from the system after any component replacement is a critical step that is often overlooked. A “spongy” ram movement is a classic sign of air entrainment, which reduces the precision and force of the press.
Step 3: Electrical and Control System Integrity
Modern HARSLE presses rely heavily on sophisticated electronics and PLC (Programmable Logic Controller) systems to manage complex forming cycles. The electrical cabinet is the brain of the operation and must be kept clean and cool. Dust, especially metallic dust common in fabrication shops, can cause short circuits if it settles on sensitive circuit boards. During your Step-By-Step Hydraulic Press Preventive Maintenance Workshops, the electrical cabinet should be opened (with power safely locked out) and vacuumed out. Avoid using compressed air, as it can drive moisture and debris deeper into components.
Check all wiring for signs of heat damage or fraying. Loose connections are a major cause of intermittent faults and electrical fires. Over time, the vibrations of the press can cause terminal screws to back out. Periodically tightening these connections can prevent “ghost” errors that are notoriously difficult to diagnose. Additionally, inspect the cooling fans and filters on the electrical cabinet. If the cabinet overheats, the PLC or motor drives may shut down or suffer permanent damage. Ensuring proper airflow is a simple but effective preventive measure.
Sensors and limit switches are the “eyes” of the press. They tell the controller where the ram is and when to stop. These components are often located in areas where they are exposed to oil, vibration, and physical impact. Ensure that all sensors are securely mounted and that their cables are protected. If a limit switch is slightly out of alignment, it can cause the ram to over-travel, potentially damaging the tooling or the press frame. Calibrating these sensors annually ensures that the press maintains its accuracy and repeatability, which is essential for high-quality metal fabrication.
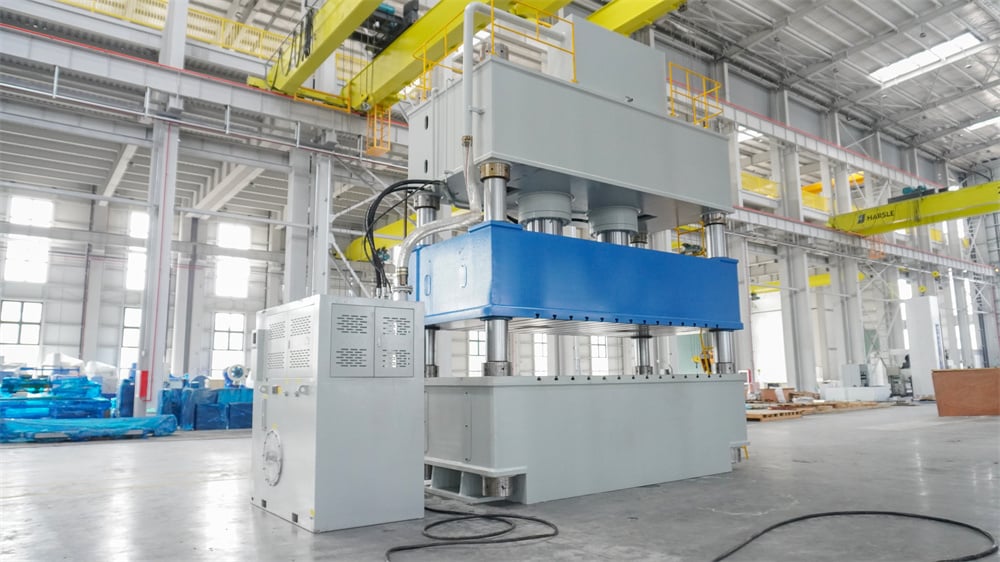
Step 4: Mechanical Structure and Ram Alignment
While the hydraulics provide the power, the mechanical frame and ram provide the precision. The Step-By-Step Hydraulic Press Preventive Maintenance Workshops must include a thorough check of the machine’s structural integrity. Start with the ram gibs—the guides that ensure the ram moves perfectly vertically. Over time, these guides can wear, leading to “ram float” or tilting. This misalignment results in uneven pressure distribution across the tooling, causing premature tool wear and poor part quality. Use a feeler gauge to check the clearance between the ram and the gibs, and adjust them according to HARSLE’s specifications.
The press bed and bolster plate should be inspected for flatness and signs of cracking. In heavy-duty applications, the constant cycling of high tonnage can lead to fatigue cracks in the welds or the base metal. While HARSLE presses are engineered for extreme durability, no machine is immune to the laws of physics. Using non-destructive testing (NDT) methods like dye penetrant can help identify surface cracks before they become structural failures. Also, ensure that the bolster plate is clean and free of burrs, as any debris between the plate and the tooling will affect the accuracy of the press stroke.
Bolts and fasteners are the unsung heroes of the hydraulic press. The massive forces generated during a press stroke can cause even the largest bolts to stretch or loosen over time. Periodically check the torque on the tie-rod nuts and the mounting bolts for the main cylinder and pump motor. A loose cylinder mounting bolt can lead to vibration that destroys seals and misaligns the entire hydraulic circuit. Using a torque wrench to verify these critical fasteners is a vital part of a comprehensive mechanical maintenance plan.
Step 5: Developing a Robust Lubrication Plan
Lubrication is the lifeblood of the mechanical components. Without it, friction will quickly destroy the precision surfaces of the gibs, bearings, and bushings. A Step-By-Step Hydraulic Press Preventive Maintenance Workshops guide must specify the type of lubricant, the location of the lubrication points, and the frequency of application. Many HARSLE presses feature automatic lubrication systems that deliver a precise amount of grease or oil to the guides at set intervals. However, these systems are not “set and forget.” The reservoir must be kept full, and the delivery lines must be checked for blockages.
If your press requires manual lubrication, create a map of all grease nipples. It is easy to miss a hidden fitting behind a guard or under the bed. Use the correct grade of lubricant; substituting a general-purpose grease for a high-pressure, molybdenum-disulfide grease can lead to premature wear. Over-lubrication can be just as harmful as under-lubrication, as excess grease can attract abrasive dust and create a grinding paste that accelerates wear. The goal is to maintain a thin, consistent film of lubricant on all moving surfaces.
In addition to the ram guides, don’t forget the lubrication of auxiliary components like the motor bearings and any pivoting linkages in the safety guards. A well-lubricated machine runs quieter, cooler, and more smoothly. If you notice that a specific guide is always dry despite the lubrication system running, there may be a broken line or a clogged metering valve. Addressing these small issues immediately prevents the need for expensive regrinding of the ways or replacement of the gib liners later on.
Troubleshooting Signals: Listening to Your Machine
Experienced operators often say they can “hear” when a press is unhappy. Part of the Step-By-Step Hydraulic Press Preventive Maintenance Workshops training should involve teaching staff to recognize the early warning signals of trouble. Unusual noises are often the first indicator. A high-pitched squeal might indicate a failing bearing or a pump struggling with high viscosity oil in cold weather. A rattling sound could mean a loose component or air in the hydraulic lines. If the press starts making a “clunking” sound at the bottom of the stroke, it could indicate that the ram is hitting a mechanical stop or that the tooling is misaligned.
Heat is another major indicator. If the hydraulic tank feels excessively hot to the touch, or if the oil cooler’s discharge air is cool while the oil is hot, the heat exchanger is likely fouled. Excessive heat in the motor usually points to an electrical overload or a phase imbalance. Vibration is the third major signal. While some vibration is normal during a high-tonnage break-through, constant vibration during the approach or return stroke indicates a problem. This could be due to a misaligned pump-motor coupling, an unbalanced motor, or cavitation within the hydraulic circuit.
Finally, monitor the cycle times. If the press starts taking longer to complete a cycle, it is a sign of declining efficiency. This could be caused by internal leakage in the cylinder (oil bypassing the piston seals), a worn pump that can no longer maintain flow at high pressure, or a proportional valve that is sticking. By tracking cycle times and comparing them to the machine’s original specifications, you can quantify the decline in performance and schedule maintenance before the machine becomes a bottleneck in your production line.
Comprehensive Maintenance Schedule Table
To help organize your Step-By-Step Hydraulic Press Preventive Maintenance Workshops, use the following table as a template for your facility. Adjust the frequencies based on your specific shift patterns and the intensity of your operations.
| Frequency | Component | Action Required | Goal |
|---|---|---|---|
| Daily | Hydraulic Fluid | Check level and temperature | Prevent pump cavitation and oil oxidation |
| Daily | Safety Systems | Test E-stops and light curtains | Ensure operator safety |
| Daily | Visual Inspection | Check for leaks and loose parts | Identify early warning signs |
| Weekly | Filters | Check bypass indicators | Maintain fluid cleanliness |
| Weekly | Ram Gibs | Inspect lubrication film | Prevent guide wear |
| Monthly | Electrical Cabinet | Clean filters and vacuum dust | Prevent electronic failure |
| Monthly | Fasteners | Check torque on critical bolts | Maintain structural integrity |
| Quarterly | Hydraulic Hoses | Inspect for wear and bulging | Prevent high-pressure bursts |
| Quarterly | Oil Analysis | Send sample to lab | Monitor internal component wear |
| Annually | Full System Calibration | Verify pressure and stroke accuracy | Maintain production quality |
| Annually | Hydraulic Oil | Change oil and clean reservoir | Remove accumulated contaminants |
Frequently Asked Questions (FAQ)
1. How often should I change the hydraulic oil in my HARSLE press?
Generally, hydraulic oil should be changed every 2,000 to 4,000 operating hours, or at least once a year. However, this depends heavily on the operating environment and the results of your oil analysis. If the oil is kept clean and cool, it may last longer; if the machine runs in a hot, dusty environment, it may need more frequent changes.
2. What is the most common cause of hydraulic press failure?
Contamination of the hydraulic fluid is the leading cause of failure. Dirt, moisture, and metal particles damage pumps, valves, and seals. Maintaining a strict filter replacement schedule and keeping the reservoir sealed is the best way to prevent this.
3. Why is my hydraulic press losing pressure?
Pressure loss can be caused by several factors: a worn-out pump, a leaking relief valve, internal leakage in the cylinder (piston seal failure), or a leak in the high-pressure piping. Start by checking the relief valve settings and inspecting the cylinder for bypass.
4. Can I use any hydraulic oil in my press?
No. You must use the oil viscosity and type recommended by HARSLE. Using the wrong oil can lead to poor lubrication, seal damage, and sluggish performance. Most presses use an ISO VG 32, 46, or 68 anti-wear hydraulic oil.
5. How do I know if my ram gibs need adjustment?
If you notice uneven wear on your tooling, or if the ram seems to “shudder” during its stroke, the gibs may be loose. Use a feeler gauge to check the clearance against the manufacturer’s specs. If the gap is too large, the ram will tilt under load.
6. What should I do if I find a leak?
Never ignore a leak. Even a small drip can lead to a major failure. Identify the source, depressurize the system, and tighten the fitting or replace the seal/hose. Always follow proper Lockout/Tagout (LOTO) procedures before performing repairs.
7. Why is my hydraulic system running hot?
Overheating is usually caused by a fouled heat exchanger, a pump that is constantly running at high pressure (relief valve set too low or stuck), or low oil levels. Ensure the cooling water or air is flowing correctly and that the oil level is sufficient.
8. Is it necessary to bleed air from the system?
Yes. Air in the system causes “spongy” operation, noise, and can damage components through a process called micro-dieseling. Always bleed the air after changing oil or replacing any hydraulic component.
9. How can I improve the lifespan of my press?
The best way is to follow a Step-By-Step Hydraulic Press Preventive Maintenance Workshops program. Consistent lubrication, clean oil, and prompt attention to minor issues will significantly extend the life of the machine.
10. What safety gear is needed for maintenance?
Technicians should wear safety glasses, oil-resistant gloves, and steel-toed boots. When working on the electrical system, arc-flash protection may be required. Always ensure the ram is mechanically blocked (using safety blocks) before working under it.
Conclusion: The Long-Term Value of Maintenance
Implementing a Step-By-Step Hydraulic Press Preventive Maintenance Workshops strategy is an investment in the future of your business. While it requires a commitment of time and resources, the return on investment is undeniable. A well-maintained HARSLE hydraulic press will provide decades of reliable service, maintaining the precision and power required for high-quality metal fabrication. By following the protocols outlined in this guide—from daily visual checks to annual oil analysis—you protect your equipment, your operators, and your bottom line. Remember, the goal of maintenance is not just to fix what is broken, but to ensure that nothing breaks in the first place. Stay proactive, stay disciplined, and your workshop will reap the rewards of maximum uptime and superior production quality.












