
How to Inspect and Maintain Press Brake Tooling for Longer Service Life


The Critical Importance of Press Brake Tooling Maintenance
In the world of precision metal fabrication, the press brake is the workhorse of the shop floor. However, even the most advanced CNC press brake is only as good as the tooling it utilizes. To inspect and maintain press brake tooling for longer service life is not merely a suggestion; it is a fundamental requirement for any operation seeking to maintain high accuracy, reduce scrap rates, and protect their capital investment. Tooling represents a significant portion of the overall cost of a bending system, and neglecting its care can lead to premature wear, inconsistent bend angles, and even safety hazards.
When we talk about tooling, we are referring to the punches and dies that physically contact the metal. These components endure immense pressure, often exceeding hundreds of tons per meter. Over time, this pressure, combined with the friction of the workpiece sliding over the die shoulders, causes microscopic deformations. If these are not addressed through a rigorous maintenance program, they escalate into visible cracks, chips, and permanent loss of precision. A well-maintained set of tools can last for decades, whereas neglected tools may fail within a few years of heavy use.
Furthermore, the relationship between the machine and the tool is symbiotic. Worn tooling forces the hydraulic system to work harder to achieve the desired angle, leading to increased wear on the machine’s seals and valves. By focusing on how to inspect and maintain press brake tooling for longer service life, fabricators are simultaneously extending the life of the press brake itself. This guide provides a comprehensive roadmap for establishing a professional maintenance culture within your facility.
Finally, the quality of the finished product is directly tied to the condition of the tooling. In industries like aerospace, medical device manufacturing, and high-end electronics, a deviation of even half a degree in a bend angle can result in a rejected part. Consistent inspection ensures that your tools remain within the tight tolerances required for modern industrial applications, keeping your business competitive and your customers satisfied.

Daily Inspection Protocols for Press Brake Tooling
The first line of defense in extending tooling life is the daily inspection. This should be a non-negotiable part of the operator’s morning routine. Before the first part is bent, the operator must perform a visual and tactile assessment of the punches and dies. This starts with cleaning. Dust, metal shavings, and residual oil can hide small cracks or pits that, if left unnoticed, could lead to catastrophic tool failure under load.
During the daily inspection, operators should look for “galling.” Galling occurs when small particles of the workpiece material—especially common with stainless steel and aluminum—weld themselves to the tool surface due to high pressure and heat. If these deposits are not removed, they act as abrasives, scratching subsequent workpieces and eventually altering the geometry of the tool. Using a soft stone or a specialized cleaning pad can remove these deposits without damaging the hardened surface of the tool.
Another critical daily check is the inspection of the tool’s “tip radius” on the punch and the “shoulder radii” on the die. These are the areas that experience the highest stress. Any signs of flattening or deformation indicate that the tool is reaching its limit or is being used for a material thickness it wasn’t designed for. If the punch tip becomes flat, the bend radius of the part will increase, leading to dimensional inaccuracies in the final assembly.
Lastly, check the alignment. Even if the tools look perfect, if they are not seated correctly in the clamping system, they will wear unevenly. A punch that is slightly offset will put lateral pressure on the die, leading to “side-loading” which can snap a punch or crack a die rail. Ensuring that every tool segment is perfectly butted against its neighbor and securely clamped is a vital daily task to inspect and maintain press brake tooling for longer service life.
Hydraulic, Electrical, and Mechanical System Synergy
While the focus is on the tooling, the environment in which the tool operates is dictated by the machine’s hydraulic, electrical, and mechanical systems. To inspect and maintain press brake tooling for longer service life, one must ensure the machine is delivering force evenly and accurately. If the hydraulic cylinders are out of sync, the ram will tilt, causing the punch to enter the die at an angle. This uneven distribution of force is a leading cause of premature tooling wear.
From a mechanical perspective, the clamping system must be inspected regularly. Whether you use manual clamps, hydraulic power clamping, or pneumatic systems, the gripping force must be consistent across the entire length of the ram. Loose clamps allow the tool to move during the bend, which not only ruins the part but also causes “fretting”—a type of wear caused by minute vibrations between two surfaces under load. Check the bolts, wedges, and plates for signs of fatigue or deformation.
The electrical system and the CNC controller play a role in tooling protection through “tonnage limiting.” Modern HARSLE press brakes allow operators to input the maximum allowable tonnage for a specific tool. If the machine’s sensors detect that the pressure required to make a bend is approaching the tool’s limit, it will stop the cycle. Maintaining these sensors and ensuring the software is correctly calibrated is essential. An electrical fault that bypasses these safety limits can result in a “bottoming out” scenario that shatters the tooling instantly.
Additionally, the mechanical backgauge system must be calibrated. If the backgauge is slightly off, the operator might try to compensate by adjusting the tool position or the ram depth, leading to improper tool usage. A holistic approach that includes checking the machine’s parallelism and the backgauge’s accuracy is the only way to truly protect your tooling investment over the long term.
Developing a Comprehensive Lubrication Plan
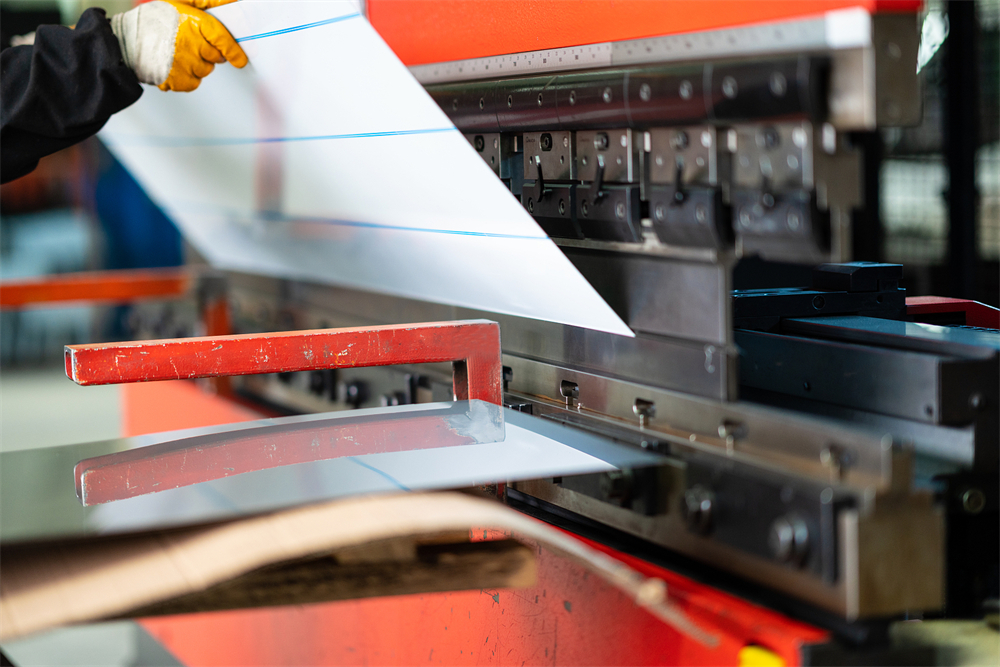
Lubrication is often misunderstood in press brake operations. Some believe that tools should be kept bone-dry to avoid attracting dust, while others over-lubricate, leading to a messy work environment and slipping workpieces. The truth lies in a balanced, strategic lubrication plan. To inspect and maintain press brake tooling for longer service life, you must use the right lubricant in the right places at the right intervals.
The primary area requiring lubrication is the contact point between the workpiece and the die shoulders. As the metal is pushed into the V-opening, it slides over these shoulders. Without lubrication, the friction generates heat and promotes the galling mentioned earlier. Using a dry-film lubricant or a specialized bending oil can significantly reduce this friction. For sensitive materials like polished stainless steel or painted aluminum, using a “bending tape” or cloth barrier can act as a sacrificial lubricant layer, protecting both the tool and the part.
Beyond the contact points, the tangs of the tools (the part that fits into the holder) should be lightly coated with a rust-inhibitive oil. This prevents corrosion, which can make tools difficult to remove or seat properly. However, avoid using heavy grease in the clamping area, as this can trap metal fines and create an abrasive paste that wears down the precision-ground surfaces of the ram and the tool tang.
The frequency of lubrication depends on the material being bent. Galvanized steel, for example, leaves behind zinc flakes that require frequent cleaning and re-lubrication. On the other hand, clean cold-rolled steel is less demanding. A good rule of thumb is to wipe down and re-apply a light protective film at the end of every shift. This not only lubricates but also provides a barrier against atmospheric moisture, preventing rust during downtime.
Identifying Troubleshooting Signals and Wear Patterns
A skilled operator can “read” the tooling and the workpieces to identify problems before they cause a failure. One of the most common troubleshooting signals is the appearance of heavy scoring or scratches on the outside of the bend. This usually indicates that the die shoulders are worn, pitted, or contaminated with debris. If you see these marks, it is time to stop and inspect and maintain press brake tooling for longer service life by cleaning or regrinding the die.
Another signal is an inconsistent bend angle across the length of a long part. If the center of the part is open while the ends are at the correct angle, it might be a machine crowning issue, but it could also be that the center segments of your tooling are more worn than the ends. This happens because most shops perform small-width bends in the center of the machine, concentrating wear in one spot. Rotating your tool segments or using different sections of the bed can help equalize this wear.
Listen to the machine. Unusual popping or cracking sounds during the bend cycle can indicate that the tool is flexing or that there is a crack beginning to propagate through the tool body. If a tool develops a hairline crack, it is a ticking time bomb. Under the high pressure of a bend, that crack can fail catastrophically, sending shards of hardened steel across the shop. Regular use of dye penetrant inspection (DPI) on high-stress tools can reveal these hidden dangers.
Finally, monitor the tonnage. If the CNC controller shows that it requires more tonnage to bend the same material than it did a month ago, the tools are likely dulling. Just like a kitchen knife, a dull punch requires more force to penetrate and deform the metal. This extra force accelerates the wear cycle, creating a downward spiral of tool degradation. Recognizing these signals early allows for proactive maintenance rather than reactive replacement.
Comprehensive Maintenance Schedule Table
To ensure consistency, every fabrication shop should follow a structured maintenance schedule. Below is a recommended timeline to help you inspect and maintain press brake tooling for longer service life.
| Frequency | Task Description | Target Component |
|---|---|---|
| Daily | Visual inspection for cracks, chips, and galling. | Punches and Dies |
| Daily | Clean tool surfaces with a lint-free cloth and light solvent. | All Tooling |
| Daily | Verify tool alignment and secure clamping. | Clamping System |
| Weekly | Check for shoulder wear and tip radius deformation. | High-use Tooling |
| Weekly | Apply rust-preventative film to unused tool segments. | Storage Rack |
| Monthly | Detailed measurement of tool height and geometry. | Precision Tooling |
| Monthly | Inspect clamping plates and hydraulic lines for leaks. | Machine Interface |
| Quarterly | Dye penetrant testing for structural integrity. | Heavy-duty Punches |
| Annually | Professional regrinding and re-certification. | Full Tool Sets |
Frequently Asked Questions (FAQ)
1. Can I regrind my press brake tooling to extend its life?
Yes, most high-quality press brake tools are made from hardened alloys like 42CrMo and can be reground. However, it is critical that the regrinding is done by a professional using specialized equipment. The original geometry, including the tip radius and the angle, must be maintained perfectly. Also, keep in mind that regrinding changes the height of the tool, so all tools in a set must be ground to the same height to ensure consistency.
2. What is the best way to store press brake tooling?
Tooling should be stored in a clean, dry, and organized environment. Ideally, use a dedicated tooling cabinet with wooden or plastic-lined shelves to prevent metal-on-metal contact, which can cause nicks. Store tools vertically or on their tangs. Never stack punches on top of each other. Labeling the racks clearly helps operators find the right tool quickly and ensures they are returned to the correct spot, reducing the risk of accidental damage during handling.
3. How does material type affect tooling wear?
Harder materials and those with high abrasive content wear tools faster. Stainless steel is notorious for causing galling, while hot-rolled steel with mill scale is very abrasive and can grind down die shoulders quickly. If you frequently bend these materials, you may need to increase the frequency of your inspections and use specialized coatings or lubricants to inspect and maintain press brake tooling for longer service life.
4. When should I stop using a tool and replace it?
A tool should be replaced immediately if it shows any structural cracks, significant chipping (more than a few millimeters), or if it has been deformed beyond the point where it can produce an accurate bend. Using a compromised tool is a major safety risk. If the cost of regrinding a tool to restore its accuracy exceeds 50-60% of the cost of a new tool, replacement is usually the more economical long-term choice.
5. Does the machine’s crowning system affect tool life?
Absolutely. A properly functioning crowning system ensures that the pressure is distributed evenly across the entire length of the tool. If the crowning is incorrect, the center of the tool set will experience higher or lower pressure than the ends, leading to uneven wear. Regularly calibrating your machine’s crowning system is an indirect but essential part of tooling maintenance.
6. Is it necessary to use lubrication for every bend?
While not strictly necessary for every single bend on mild steel, lubrication is highly recommended for stainless, aluminum, and galvanized materials. Even on mild steel, a light lubricant reduces the force required and protects the tool surface. If you are aiming for the maximum possible service life, consistent lubrication is one of the easiest and most effective habits to adopt.












