Comprehensive Guide: What to Inspect Before Starting a Punching Machine Each Day


The Critical Importance of Daily Punching Machine Maintenance
In the high-stakes world of metal fabrication, the punching machine stands as a cornerstone of productivity. Whether you are operating a mechanical power press or a high-speed CNC turret punch, the mechanical stresses involved are immense. Every stroke involves tons of force concentrated on a small surface area. Consequently, the question of what to inspect before starting a punching machine each day is not merely a matter of protocol; it is a fundamental requirement for operational safety, part precision, and equipment longevity.
Neglecting daily inspections can lead to a domino effect of industrial setbacks. Minor issues, such as a slightly loose die or a drop in hydraulic pressure, can quickly escalate into catastrophic failures that halt production lines for days or weeks. Beyond the financial implications of downtime, the safety of the operator is paramount. A machine that is not properly vetted before operation poses a significant risk of mechanical ejection, structural failure, or electrical fire. By implementing a rigorous daily checklist, manufacturers can ensure that their HARSLE equipment operates at peak efficiency while maintaining a safe working environment.
Furthermore, consistent daily inspections contribute to the overall Return on Investment (ROI) of the machinery. Industrial equipment is a significant capital expenditure. By identifying wear and tear early, maintenance teams can perform minor adjustments rather than expensive overhauls. This proactive approach extends the service life of the machine by years, ensuring that the precision of the punch remains within tight tolerances, thereby reducing scrap rates and improving customer satisfaction.
Finally, a well-documented inspection routine is often a requirement for insurance compliance and ISO certification. Keeping a log of what you inspect before starting a punching machine each day provides a paper trail of due diligence. This guide will detail the specific mechanical, hydraulic, and electrical components that require your attention every morning before the first sheet of metal is loaded.
The Daily Inspection Walk-Around: A Systematic Approach
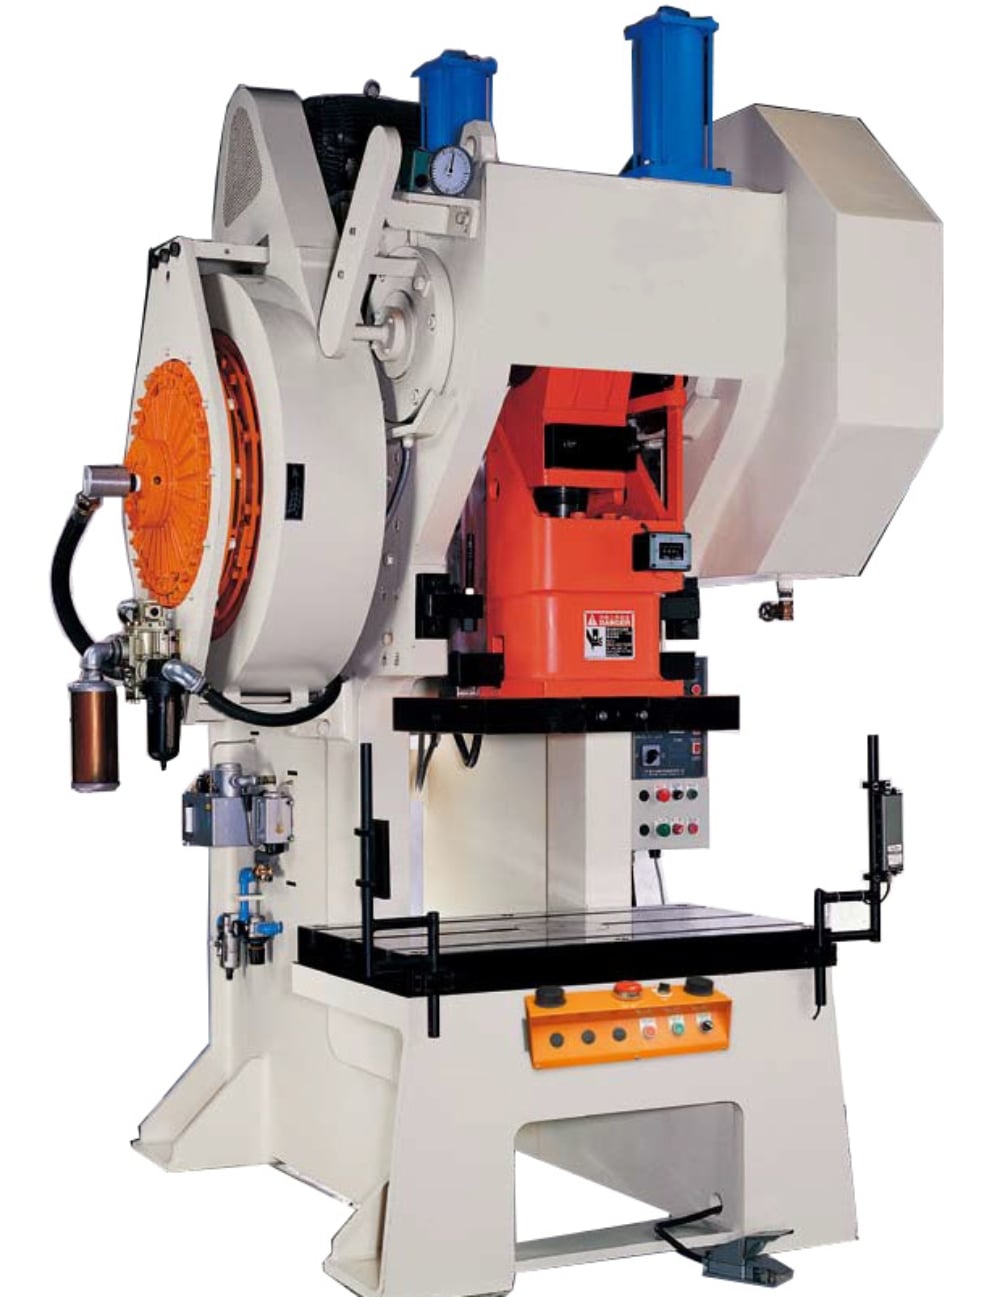
Before turning on the main power, an operator should perform a visual “walk-around” of the machine. This initial phase of the inspection is designed to catch obvious physical abnormalities that may have occurred during the previous shift or while the machine was idle overnight. Start by clearing the work area. Any debris, off-cuts, or tools left on the machine bed can interfere with the movement of the workpiece or the turret, leading to collisions.
Check the general cleanliness of the machine. Dust and metal shavings are the enemies of precision machinery. If allowed to accumulate, they can enter the lubrication system or clog cooling fans. Use a brush or compressed air (carefully) to clear the die area and the guide rails. While cleaning, look for signs of fluid leaks on the floor. A puddle of oil or hydraulic fluid is a clear indicator of a compromised seal or a loose fitting that must be addressed before the system is pressurized.
Examine the structural integrity of the machine frame. While rare, stress cracks can develop in the C-frame or H-frame of a punching machine over years of heavy use. Pay close attention to the areas around the bolster plate and the ram. Any visible deformation or cracking is a “stop-work” signal. Additionally, ensure that all safety guards and light curtains are securely in place and haven’t been bypassed or damaged. A punching machine should never be operated if its safety barriers are compromised.
Hydraulic System Checks: Ensuring Consistent Power
The hydraulic system is the heart of many modern punching machines, providing the force necessary to shear through thick steel plates. To inspect before starting a punching machine each day, you must first check the hydraulic oil level. Most machines feature a sight glass on the side of the reservoir. The oil should be at the recommended level; if it is too low, the pump may draw in air, leading to cavitation and permanent damage. Observe the color of the oil as well—cloudy or milky oil suggests water contamination, while dark, burnt-smelling oil indicates overheating.
Next, inspect the hydraulic hoses and fittings. Look for signs of “weeping” or dampness at the connections. High-pressure hydraulic leaks can be extremely dangerous, potentially causing injection injuries or fires. Check the hoses for any signs of abrasion or kinking. Because the ram moves constantly, the hoses are subject to repetitive flexing; over time, this can lead to internal structural failure of the hose. If a hose looks frayed or has a visible bulge, it must be replaced immediately.
Once the machine is powered on (but before cycling), check the pressure gauges. They should read within the manufacturer’s specified idle range. Listen for any unusual humming or whining noises coming from the hydraulic pump. A healthy pump should have a consistent, smooth sound. If you hear a rhythmic knocking or a high-pitched squeal, it could indicate air in the lines or a failing pump bearing. Monitoring the oil temperature is also vital; if the oil is too cold, the machine may need a warm-up cycle to reach the correct viscosity for accurate punching.
Electrical and Control System Verification
Modern punching machines rely heavily on sophisticated electronics and PLC (Programmable Logic Controller) systems. The electrical inspection begins with the control panel. Ensure that all buttons, switches, and the touchscreen interface are responsive and free of grime. Check that the Emergency Stop (E-Stop) buttons are not engaged and that they move freely. It is a best practice to test the E-Stop functionality at the start of the shift to ensure the machine halts immediately when the circuit is broken.
Inspect the wiring conduits leading to the motors and sensors. Look for any signs of singeing, melted insulation, or exposed wires. In a vibration-heavy environment like a metal shop, wires can rub against sharp metal edges, leading to short circuits. Ensure that the electrical cabinet door is tightly closed and locked to prevent metal dust from entering, which can cause arc flashing or component failure.
Finally, verify the sensor alignments. Punching machines use various proximity sensors and limit switches to track the position of the ram and the turret. If a sensor is loose or covered in grease, it may send false signals to the controller, resulting in “over-travel” errors or tool collisions. Check the display for any error codes or maintenance alerts that may have been triggered during the boot-up sequence. Addressing these software warnings immediately can prevent a mid-cycle shutdown that could ruin a workpiece.
Mechanical Components and Tooling Inspection
The mechanical interface between the machine and the metal is where the most wear occurs. When you inspect before starting a punching machine each day, the tooling (punches and dies) requires the most meticulous attention. Remove the punches and dies from the turret or holder and inspect the cutting edges. They should be sharp and free of chips or “galling” (where bits of the workpiece material weld themselves to the tool). Dull tools require more force to punch, which puts unnecessary strain on the machine and results in poor-quality holes with large burrs.
Check the clearance between the punch and the die. This clearance must be uniform and appropriate for the thickness of the material being processed. If the punch is slightly offset, it will strike the side of the die, leading to tool breakage and potential damage to the turret. Ensure that the stripping mechanism—the part that pulls the material off the punch after the stroke—is functioning correctly and that the springs are not fatigued or broken.
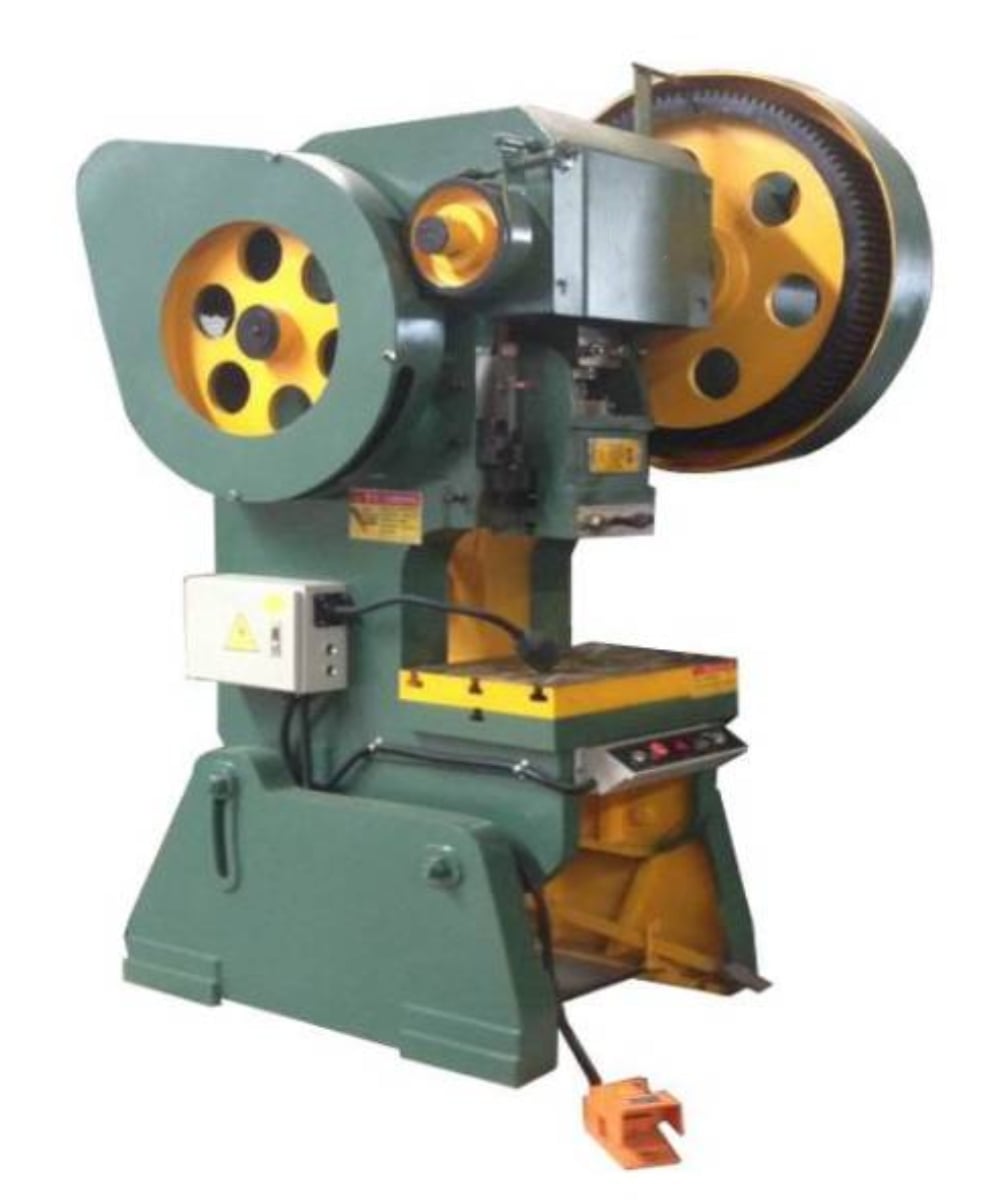
For mechanical presses, inspect the flywheel and the clutch-brake system. The clutch must engage and disengage crisply. If there is a delay or a “dragging” sound, the brake linings may be worn out. A failing brake is a severe safety hazard, as it may allow the ram to repeat a stroke unexpectedly. Also, check the tightness of the bolster bolts and the ram adjustment screws. The constant vibration of punching can loosen even the most heavy-duty fasteners over time. A loose bolster plate will vibrate, leading to inaccurate hole placement and accelerated tool wear.
The Lubrication Plan: The Secret to Machine Longevity
Lubrication is the single most important factor in preventing premature mechanical failure. A punching machine has numerous moving parts—slides, bearings, gears, and bushings—all of which generate friction. To inspect before starting a punching machine each day, you must verify that the lubrication system is functioning. Many HARSLE machines feature automatic lubrication systems; check the reservoir level and ensure the pump is cycling correctly. If the machine uses manual grease points, follow the manufacturer’s chart to ensure no nipple is missed.
Use only the lubricants specified by the manufacturer. Using the wrong grade of oil can be as damaging as using no oil at all. For example, a way-lube with the wrong tackiness might not stay on vertical surfaces, leaving the ram guides dry. Observe the “ways” or guide rails; they should have a thin, consistent film of oil. If they appear dry or have a “rainbow” sheen (indicating heat), the lubrication delivery lines may be blocked.
Don’t forget the pneumatic system if your machine uses air-actuated components. Check the FRL (Filter-Regulator-Lubricator) unit. Drain any accumulated water from the filter bowl and ensure the lubricator is dripping oil at the correct rate into the air stream. Moisture in the air lines can cause internal rusting of pneumatic cylinders and valves, leading to sluggish performance or total failure in cold weather.
Troubleshooting Signals: What to Listen and Look For
Even after a thorough visual inspection, the first few minutes of operation are critical. An experienced operator uses all their senses to inspect before starting a punching machine each day. When you perform the first few test punches on scrap material, listen to the sound of the machine. A sharp, clean “thud” is normal. A metallic “clack” or a grinding noise suggests that the tooling is misaligned or that there is excessive play in the bearings.
Observe the quality of the scrap slugs. The slugs can tell you a lot about the state of the machine. If the slugs are lopsided or have an uneven shear-to-break ratio, it indicates that the punch and die are not perfectly centered. If the machine vibrates excessively during the stroke, check the leveling pads. A machine that is not perfectly level will experience uneven internal stresses, which can eventually lead to a warped frame or premature bearing failure.
Finally, monitor the temperature of the motor and the main bearings after the first 30 minutes of work. While they will naturally get warm, they should never be too hot to touch. Excessive heat is a precursor to seizure. By staying attuned to these subtle signals, you can catch a problem in its infancy, long before it triggers a system-wide alarm or causes a part rejection.
Comprehensive Maintenance Schedule Table
To help organize your maintenance efforts, use the following table as a baseline for your punching machine care routine. Note that high-volume shops may need to perform these checks more frequently.
| Frequency | Component | Action Required |
|---|---|---|
| Daily | Tooling | Check for sharpness, galling, and proper alignment. |
| Daily | Hydraulic System | Check oil level, hose integrity, and operating pressure. |
| Daily | Safety Systems | Test E-Stops, light curtains, and physical guards. |
| Weekly | Air Filters | Clean or replace electrical cabinet and pneumatic filters. |
| Weekly | Fasteners | Torque bolster bolts and check for loose motor mounts. |
| Monthly | Drive Belts | Inspect for tension and signs of cracking or fraying. |
| Quarterly | Oil Analysis | Sample hydraulic oil for contamination and viscosity breakdown. |
| Annually | Full Calibration | Professional inspection of frame alignment and PLC logic. |
Frequently Asked Questions (FAQ)
1. What is the most common cause of punching machine failure?
The most common cause is improper tooling maintenance. Using dull punches or incorrect clearances forces the machine to work harder than designed, leading to hydraulic overheating, motor strain, and eventually, structural damage to the turret or ram.
2. How do I know if my hydraulic oil needs changing?
Beyond the daily check of the sight glass, you should look for changes in machine performance. If the ram becomes sluggish or the oil smells burnt, it is time for a change. A professional oil analysis every six months is the most accurate way to determine oil health.
3. Can I use any grease for the manual lubrication points?
No. You must use the specific EP (Extreme Pressure) grease recommended by HARSLE. Punching machines generate high localized heat and pressure; standard automotive grease may break down and fail to protect the bearings.
4. Why does my machine make a loud “bang” during the stroke?
A loud bang often indicates “breakthrough shock,” which occurs when the punch snaps through the material. While some noise is normal, an excessively loud bang can indicate that the clearance is too tight or that the machine’s dampening system (if equipped) is failing. It can also be a sign of a loose die.
5. How often should I sharpen my punches and dies?
This depends on the material being punched. Stainless steel dulls tools much faster than aluminum. A good rule of thumb is to inspect tools every 1,000 hits and sharpen them as soon as you notice a radius forming on the cutting edge or an increase in burr height on the workpiece.
6. What should I do if the E-Stop doesn’t work during the daily test?
Do not operate the machine. Lock out the power source and tag the machine as “Out of Service.” Contact a qualified electrician or the HARSLE service department immediately. Operating a machine with a faulty E-Stop is a violation of safety regulations and poses a life-threatening risk.
Conclusion: Consistency is Key
Knowing what to inspect before starting a punching machine each day is only half the battle; the real challenge lies in the discipline of performing these checks every single morning without fail. In a busy production environment, it is tempting to skip the inspection to save fifteen minutes, but that choice is a gamble with your equipment and your safety. By following the systematic approach outlined in this guide—covering mechanical, hydraulic, and electrical systems—you ensure that your HARSLE punching machine remains a reliable, precise, and safe asset for your fabrication shop for decades to come.